Programmable Christmas lights with Haskell and Raspberry Pi
This Christmas, I decided to experiment with some Christmas lights I can control in software.
I started with this string of lights from Amazon. (Although it may be available from other places too.) These lights take 12VDC power, and then they also have a control wire which speaks the popular WS2811 protocol at 5V. This allows each light to be individually set to an RGB color.
I wanted to program these lights in Haskell, so I needed more than just a microcontroller. A Raspberry Pi is sufficient, though. Unfortunately, the Raspberry Pi (and pretty much anything sufficient to run Haskell) runs a full-blown operating system, which gets in the way of the precise timing that would be needed to speak the WS2811 protocol, if you connected it directly to the Pi’s GPIO.
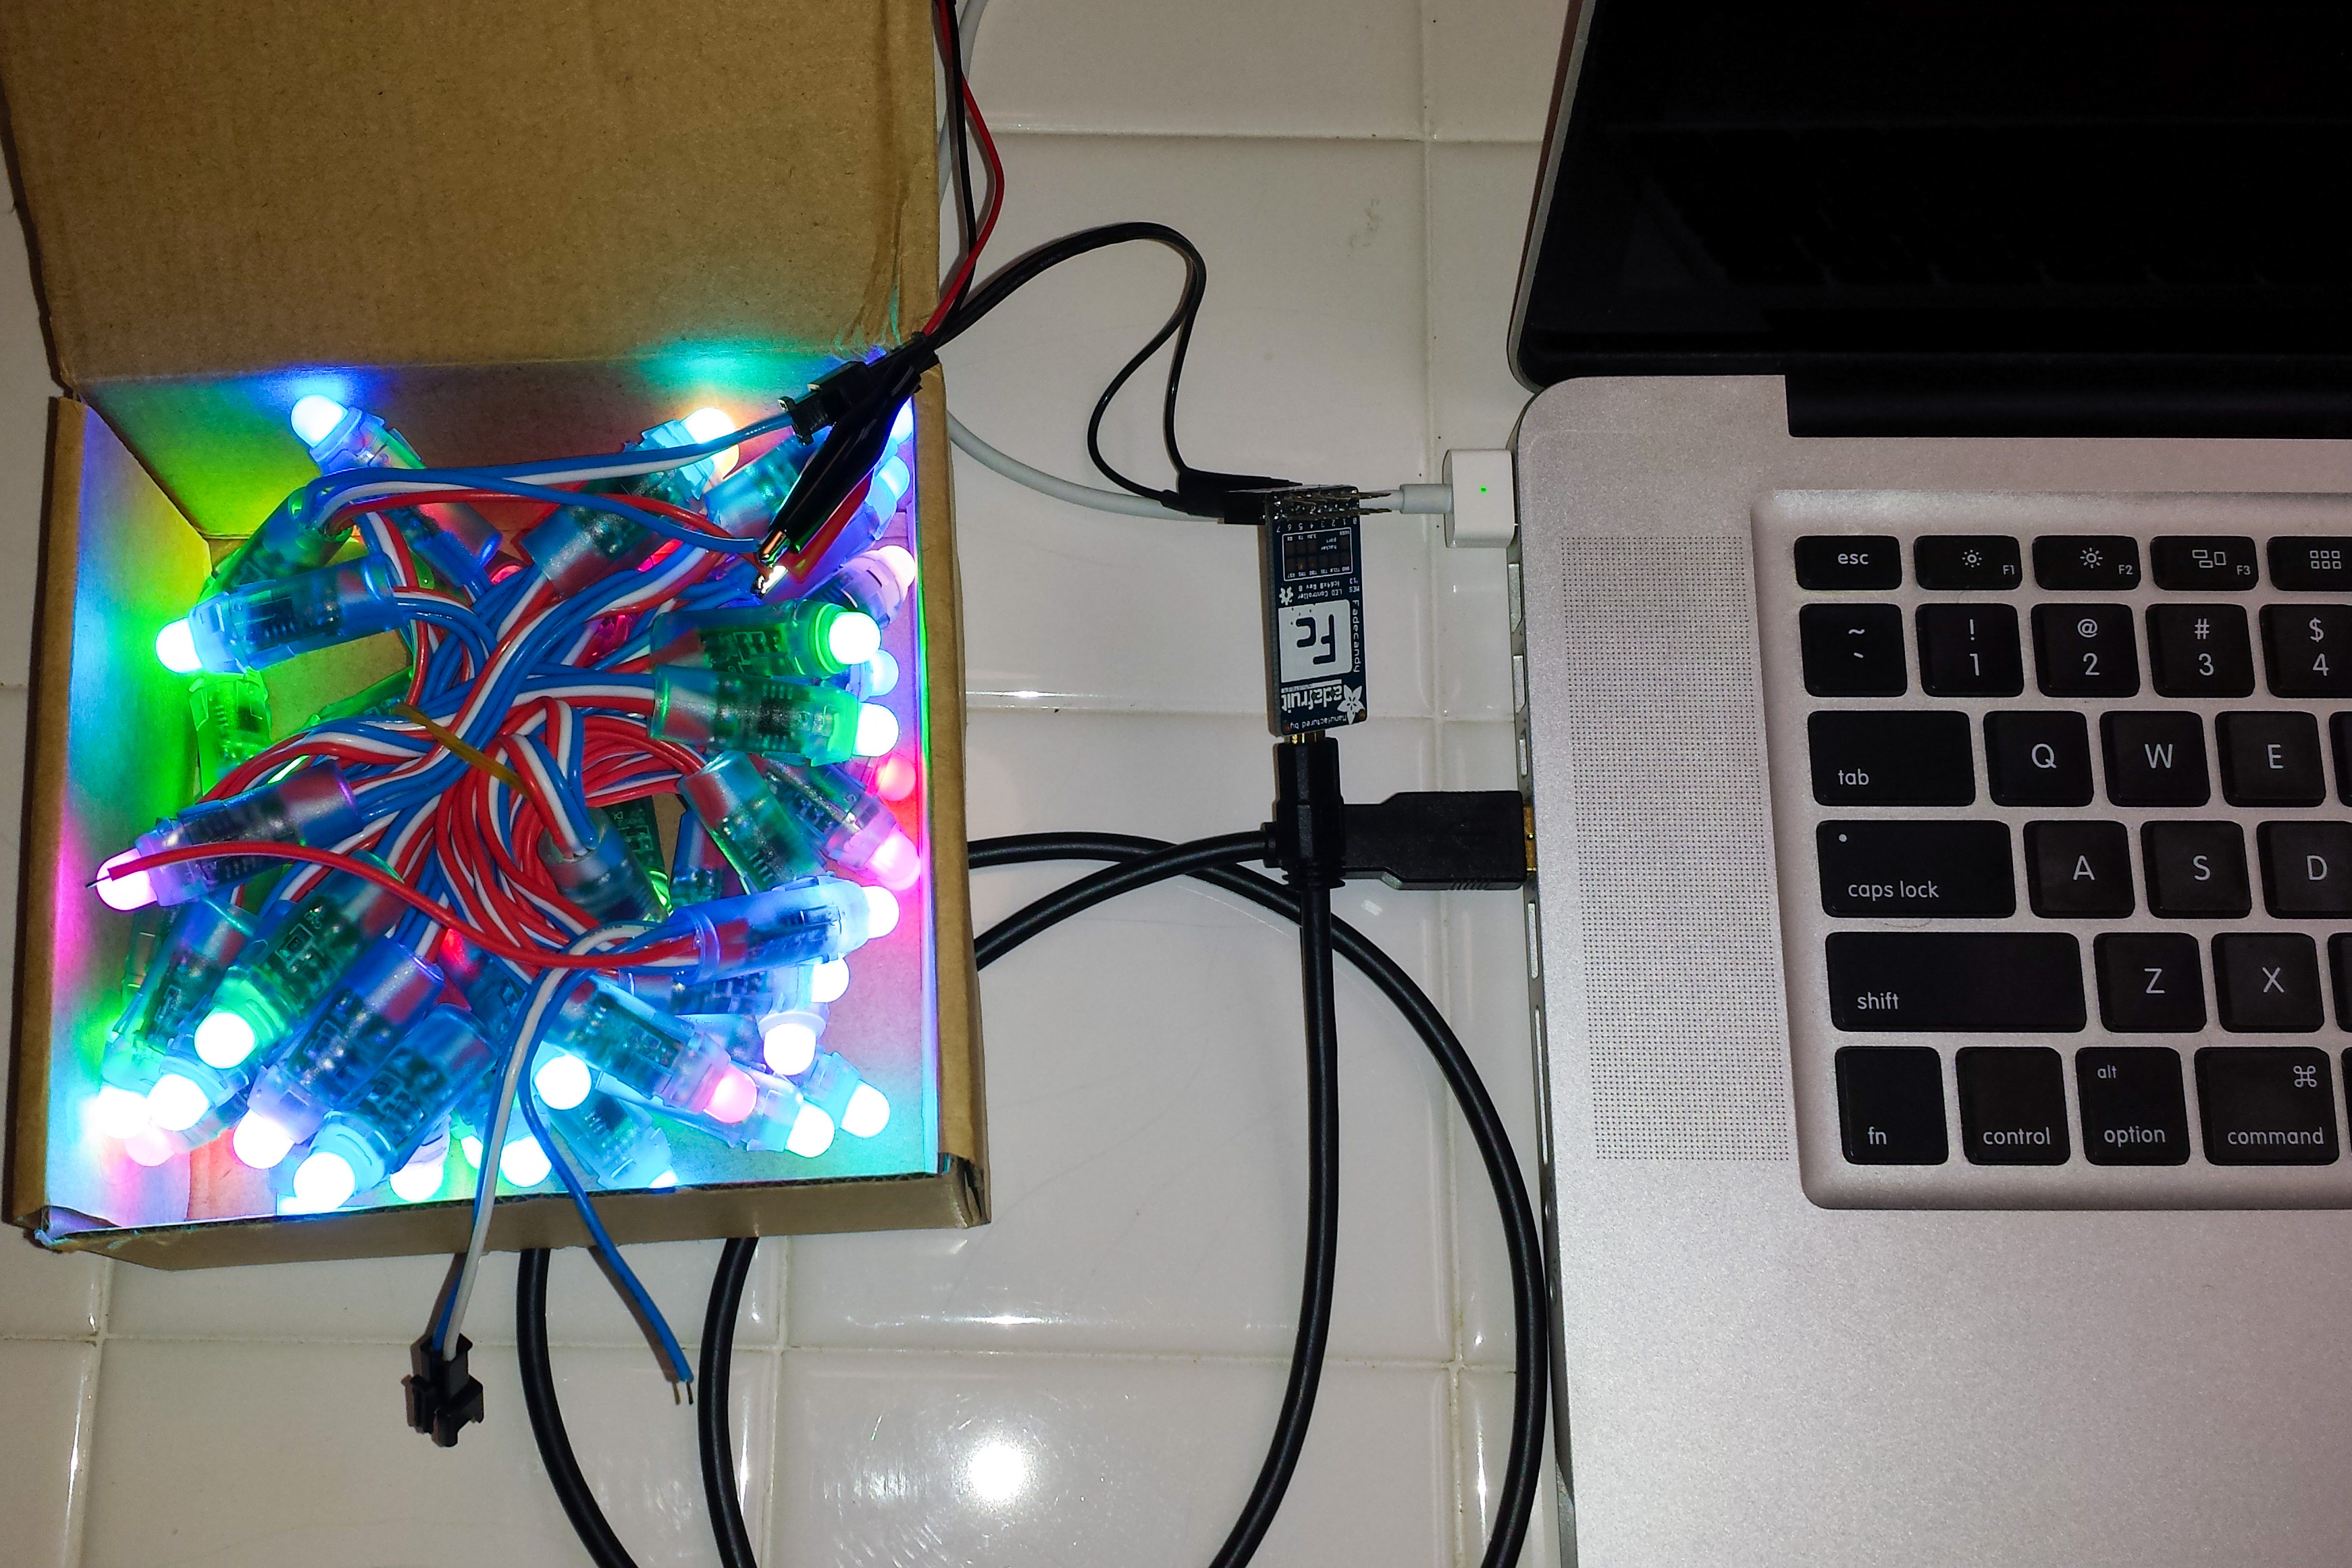
So, I bought a FadeCandy board, which speaks to the WS2811 lights, and can be controlled over USB. The USB then plugs into the Pi. (Or, it can plug into any other computer, such as my laptop, to make development a little easier.)
(It turns out that the FadeCandy may not be strictly necessary, because it looks like there is a library which uses some tricks to be able to speak to the WS2811 directly from the Pi’s GPIO, defying the common wisdom. However, since I’d already bought the FadeCandy, I decided to stick with that route. Also, I’m interested in synchronizing my LED light show to music, and the rpi_ws281x library is unable to coexist with the Pi’s built-in audio device.)
The FadeCandy has 8 outputs, each of which can control up to 64 WS2811-compatible LEDs. Since the Alitove strings I bought on Amazon have 50 LEDs, I can only put one string on each of the FadeCandy’s outputs.
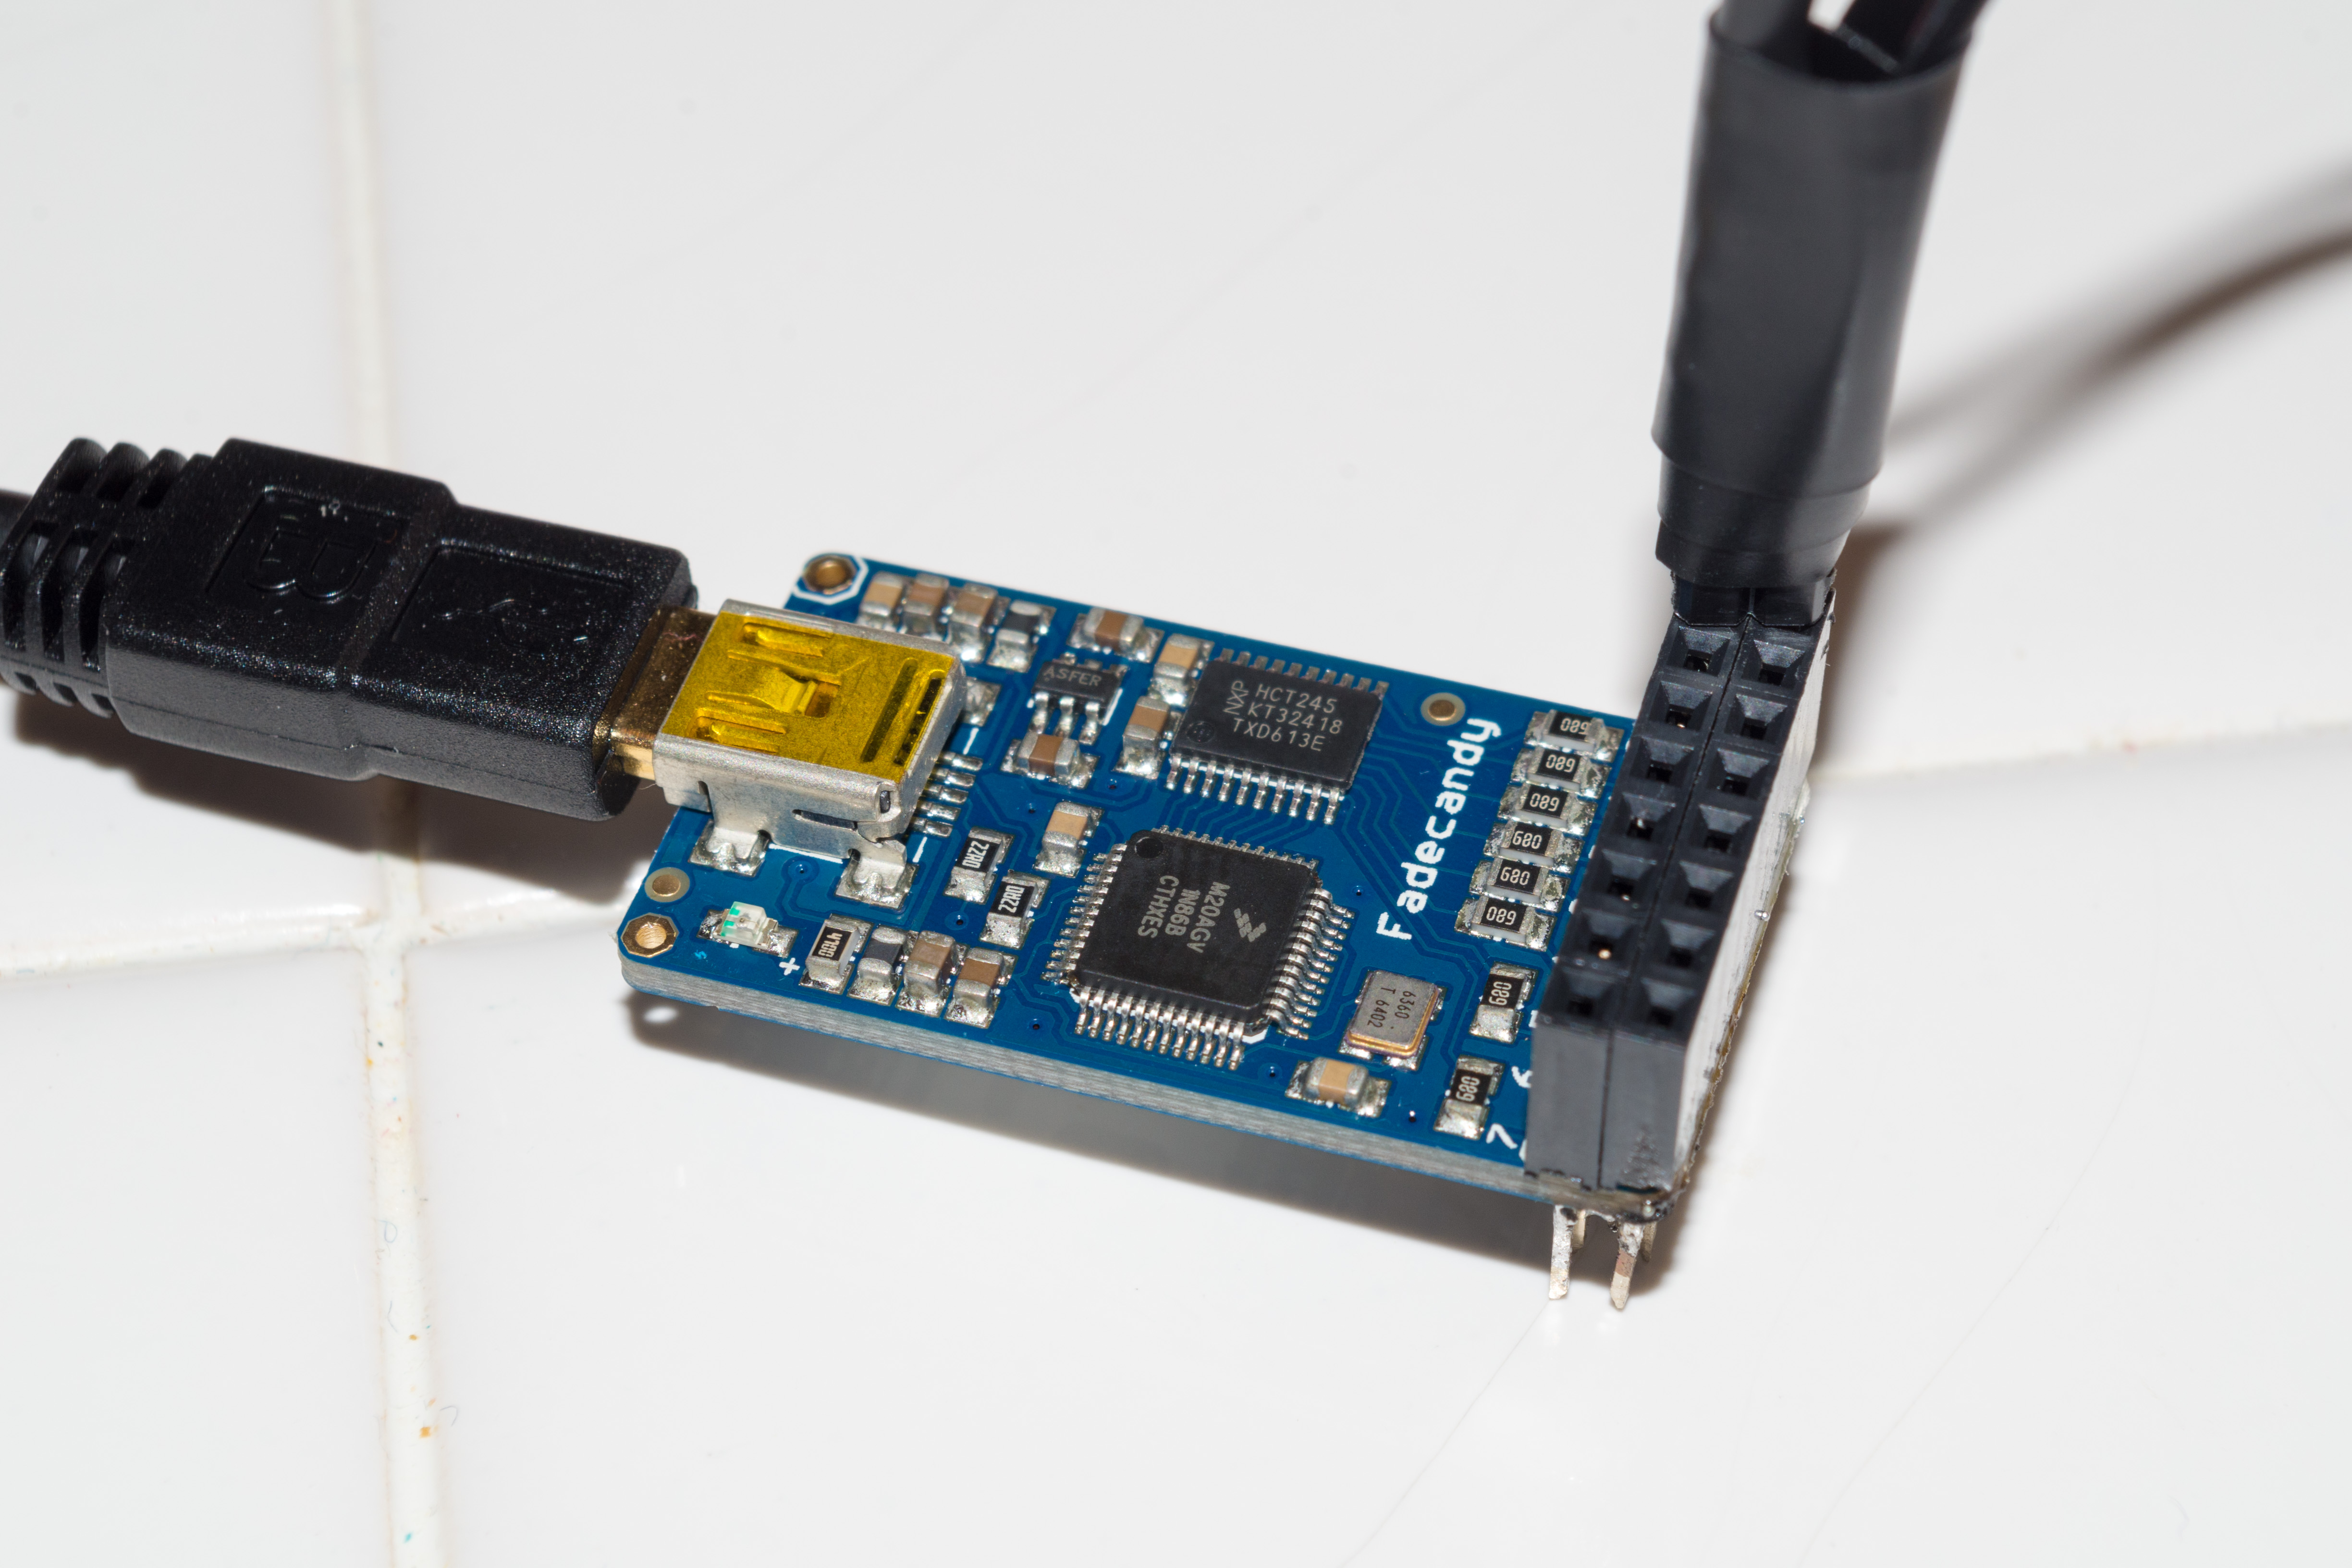
The FadeCandy comes without any sort of connectors on its outputs, so I soldered some female headers onto the FadeCandy.
To connect to the data connector of the Alitove string, I needed a JST SM connector (not to be confused with JST PH). The “input” on the alitove string is the female connector (the one without visible pins), so I need a male JST SM connector to mate with it. Adafruit only sells them in pairs, though.
It’s important to get the polarity right on the JST SM connector. The easiest way to do this is to plug it into the Alitove string. The blue wire is ground, and the white wire is data. Just trace these along the JST SM connector’s pigtail to see which wire is which.
Onto the “data” wire of the JST SM pigtail, I soldered a 470 ohm resistor. Adafruit’s guide to “Neopixels” (another name for WS2811) recommends this resistor. I suspect the FadeCandy already has this resistor built in, but the guide says adding a second one doesn’t hurt. Also, once the resistor is soldered on, it’s easier to tell which is the ground wire and which is the data wire.
Next, I slipped a bit of heat-shrink tubing onto the two wires of the JST SM pigtail. Then I soldered a 2-pin male header (easily broken off from break-away header) onto the two wires: directly onto the pigtail for ground, and onto the other end of the resistor for data. Then I slid the heat-shrink tubing down over the solder joints (including over the entire resistor) and shrunk it. Since I wasn’t successful in fully covering the solder joints with heat-shrink tubing, I then wrapped the whole thing in electrical tape for good measure.

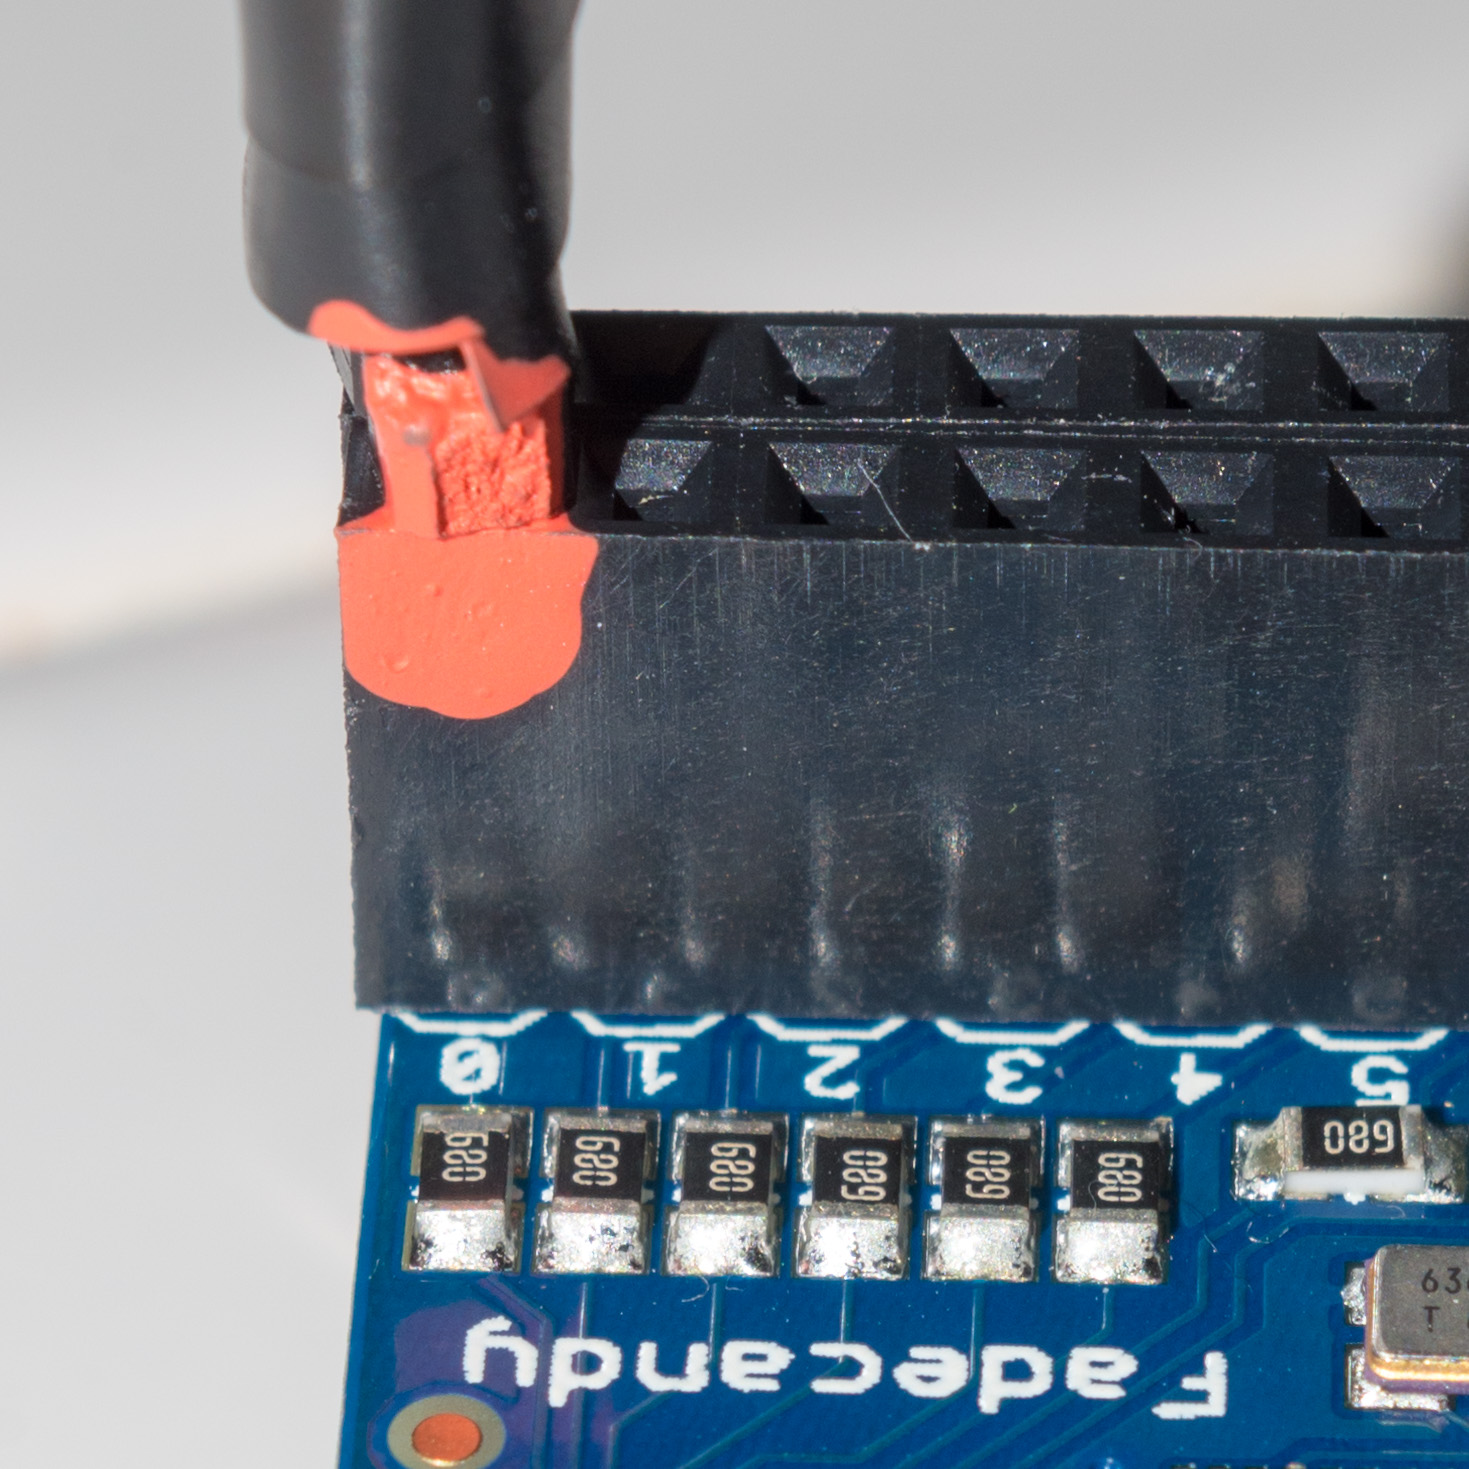
This male header can then get plugged into output 0 on the FadeCandy board. Just make sure the data line (the one with the resistor) goes on “top” (toward the interior of the board) and the ground line goes on “bottom” (toward the edge of the board).
I put a little dab of paint on the “data” side of both the male and female headers, to make it easier to tell how it should be plugged in in the future.
The bare blue and red wires on the Alitove string are for 12VDC power. (Assuming you bought the 12V version like I did. There is also a 5V version for sale on Amazon, too.) I got a 12VDC power supply and a screw-terminal power jack. Connect the “-” screw terminal to the bare blue wire, and then “+” screw terminal to the bare red wire. According to my math, the 12VDC power brick from Adafruit is 60 watts, and each Alitove string consumes 30 watts, so it should be possible to connect two strings to one power supply. Of course, there are plenty of other 12VDC power supplies, both larger and smaller, on the market elsewhere.
To get the Pi ready, I installed Raspbian “Jessie” on an SD card. (I used a 16GB card so I’d have plenty of room, though that’s probably overkill. 8GB should be plenty, and even 4GB might be enough.) I installed “Raspbian Jessie Lite,” not “Raspbian Jessie with Pixel,” because I’m going to be using the Pi headlessly. After copying the image to the SD card, I mounted the “boot” partition (which is a FAT partition) and did touch ssh. This is necessary to enable the ssh server, since I didn’t want to connect a montitor and keyboard to the Pi. Then I can just hook up the Ethernet and ssh into the Pi with username pi and password raspberry.
(With my router running OpenWRT, the Pi shows up as raspberrypi.lan, which is very convenient. Depending on your router, you may have to resort to other means to find the Pi’s address.)
First, I ran raspi-config and selected the first option, to expand the filesystem:
pi@raspberrypi:~ $ sudo raspi-configAnd I rebooted. Next, I installed some basics on the Pi:
pi@raspberrypi:~ $ sudo apt-get install git ghc cabal-install emacs-noxThen, since I really wanted to use the Pi over Wifi instead of Ethernet, I inserted an Edimax Wifi adapter into the Pi. I did:
pi@raspberrypi:~ $ sudo emacs /etc/wpa_supplicant/wpa_supplicant.confand added something of the form:
network={
    ssid="Name_of_your_network"
    psk="Your_wifi_password"
}
(but, of course, with my SSID and password. Also, I changed country from GB to US, since that’s where I am.)
Now it should be possible to reboot, disconnect the Ethernet, and ssh in via Wifi.
The next problem I ran into was this:
pi@raspberrypi:~ $ cabal update
Downloading the latest package list from hackage.haskell.org
cabal: out of memory (requested 1048576 bytes)
So, I had to increase the swap space:
pi@raspberrypi:~ $ sudo emacs /etc/dphys-swapfileI changed CONF_SWAPSIZE=100 to CONF_SWAPSIZE=2048.
Next, I copied the fcserver-rpi binary (available from FadeCandy’s bin directory, or you can build from source) into /usr/local/bin.
I used the following config file for the FadeCandy server:
{
    "listen": ["127.0.0.1", 7890],
    "verbose": true,

    "color": {
        "gamma": 2.5,
        "whitepoint": [1.0, 1.0, 1.0],
        "linearCutoff": 0.0078125
    },

    "devices": [
        {
            "type": "fadecandy",
            "map": [
                [ 0,  0,  0, 50, "grb" ],
                [ 0, 50, 64, 50, "grb" ]
            ]
        }
    ]
}
This differs from the default configuration in three ways:
I used a linearCutoff of 2/256.0 to reduce flickering at the low end.
FadeCandy supports 64 lights per output, but the Alitove strings only have 50 lights, and I wanted my two strings to appear as 100 contiguous lights.
The Alitove string seems to interpret color as GRB, rather than RGB. (I’m puzzled about this, though, because when controlling the Alitove string from an Arduino with the Adafruit Neopixel library, I had to use
NEO_RGBinstead of the defaultNEO_GRBin order to get correct colors.)
I want the FadeCandy server to start automatically on boot, and since I know nothing about run levels and init scripts, which seem to vary wildly from one distribution to another, I decided to do it hackishly using cron instead:
pi@raspberrypi:~ $ sudo emacs /etc/cron.d/fadecandyI put the following in that file:
@reboot root nohup /usr/local/bin/fcserver-rpi /home/pi/config.jsonNow the FadeCandy server will start on boot.
Next, I wrote a little Haskell program to talk to the FadeCandy server using the Open Pixel Control protocol. You can build it like this:
pi@raspberrypi:~ $ mkdir -p src
pi@raspberrypi:~ $ cd src
pi@raspberrypi:~/src $ git clone https://github.com/ppelleti/hs-opc-client.git
Cloning into 'hs-opc-client'...
remote: Counting objects: 42, done.
remote: Compressing objects: 100% (19/19), done.
remote: Total 42 (delta 21), reused 42 (delta 21), pack-reused 0
Unpacking objects: 100% (42/42), done.
Checking connectivity... done.
pi@raspberrypi:~/src $ cd hs-opc-client
pi@raspberrypi:~/src/hs-opc-client $ cabal install --dependencies-only
Resolving dependencies...
All the requested packages are already installed:
Use --reinstall if you want to reinstall anyway.
pi@raspberrypi:~/src/hs-opc-client $ cabal configure
Resolving dependencies...
Configuring hs-opc-client-0.1.0.0...
pi@raspberrypi:~/src/hs-opc-client $ cabal build
Building hs-opc-client-0.1.0.0...
Preprocessing executable 'hs-opc-client' for hs-opc-client-0.1.0.0...
[1 of 1] Compiling Main             ( Main.hs, dist/build/hs-opc-client/hs-opc-client-tmp/Main.o )
You are using a new version of LLVM that hasn't been tested yet!
We will try though...
Linking dist/build/hs-opc-client/hs-opc-client ...
pi@raspberrypi:~/src/hs-opc-client $ cabal run -- red
Preprocessing executable 'hs-opc-client' for hs-opc-client-0.1.0.0...
pi@raspberrypi:~/src/hs-opc-client $
If run with no arguments, hs-opc-client sets the string color to all white. If run with one argument, the argument must be one of the color names black, blue, cyan, green, magenta, orange, purple, red, white, or yellow. If run with three arguments, each argument must be an integer between 0-255, forming an RGB triple.
You can use this program to check that you have red, green, and blue set up correctly in your config file. And then you can use it as the basis for your own program for controlling the light string.